Step-by-Step Trellis Woodworking Plan for Garden Beginners
Do you want to make your garden look better and help plants grow? A DIY trellis is a great way to do this. It’s a fun project that lets you make something special for your garden.

With a simple guide, you can make a strong and pretty garden trellis. It’s easy because you only need a few tools and materials. It’s perfect for beginners.
This plan helps you make a beautiful woodworking trellis. It will make your garden look amazing and help your plants grow. Start your DIY project now and see how great it turns out!
Key Takeaways
- Create a unique and functional piece for your garden
- Use basic woodworking skills to build a sturdy trellis
- Enhance your garden’s beauty with a decorative trellis
- Provide support for climbing plants
- Perfect project for garden beginners
Why Build Your Own Garden Trellis
Building a trellis can make your garden look better and work better. A DIY trellis lets you pick the materials, design, and size you want. This can save you money compared to buying one.
Benefits of DIY Trellises vs. Store-Bought Options
Building your own garden trellis has many benefits. You can make it fit your plants and garden perfectly. Plus, it can be cheaper because you choose the materials.
| Feature | DIY Trellis | Store-Bought Trellis |
|---|---|---|
| Customization | Highly customizable | Limited design options |
| Cost | Variable, can be cost-effective | Fixed price, potentially higher |
| Material Choice | Wide range of materials | Limited material options |
How a Custom Trellis Enhances Your Garden Space
A custom trellis does more than just support plants. It also adds beauty to your garden. By picking the right design and materials, you can make a special spot in your garden. It’s perfect for small gardens too.

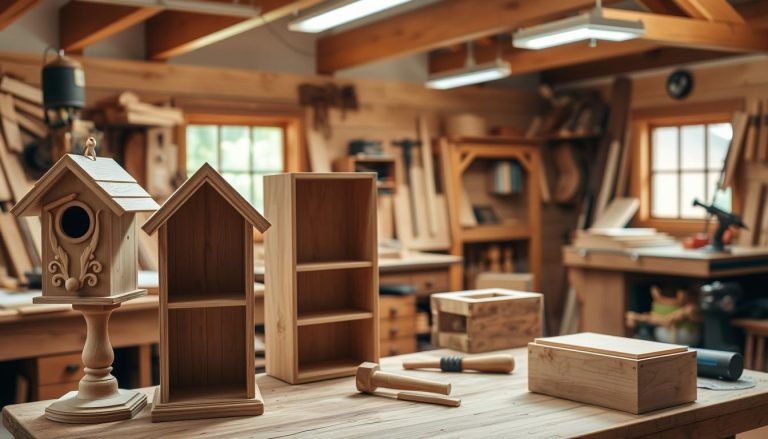
Essential Tools and Materials for Your Woodworking Trellis Project
Before starting your trellis, get the right tools and materials. The right tools help you finish your project well.
Must-Have Tools for Beginners
Beginners need basic tools to start. You’ll need a circular saw for cutting, a drill for screw holes, and sandpaper for smooth wood. A tape measure and square help with measurements and corners.

Recommended Wood Types for Outdoor Trellises
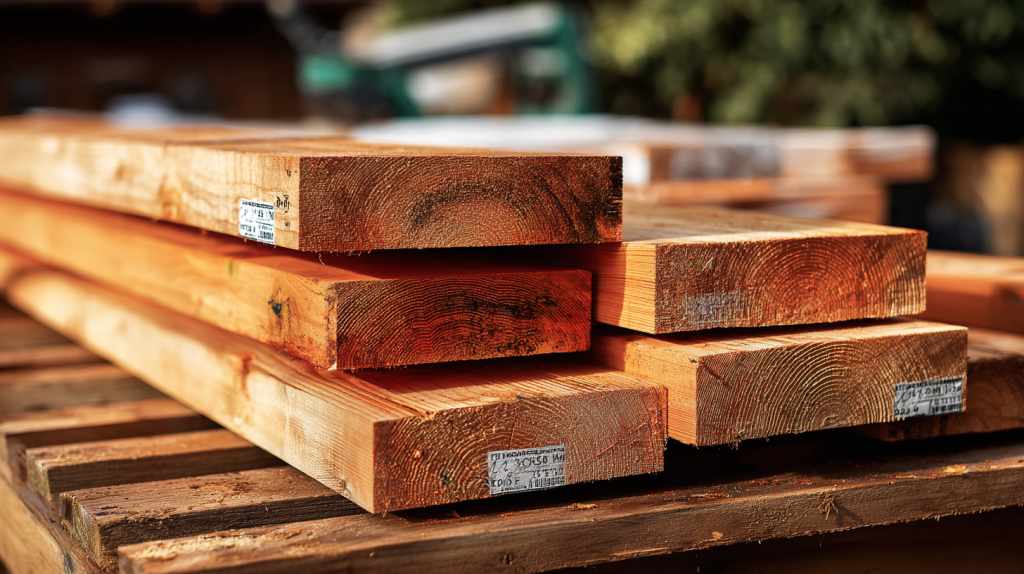
Outdoor trellises need strong, weather-resistant wood. Cedar and redwood are good because they fight rot and bugs. Pressure-treated lumber also works well against the weather.
Additional Materials and Hardware
You’ll need more than just tools and wood for your trellis. You’ll need screws, nails, and weather-resistant wood glue. Use weather-resistant finishes like varnish to keep your trellis safe from the weather.
Planning Your Trellis Design

Before you start building, it’s key to plan your trellis design. A good trellis supports your plants and makes your garden look better.
Popular Trellis Styles for Different Garden Needs
Different gardens need different trellis styles. For example, a fan-shaped trellis is great for climbing roses. A grid trellis is good for many vegetables.
Determining the Right Size and Dimensions
Think about your plants’ full size and your garden’s space. This helps pick the right trellis size.
| Trellis Type | Ideal Plant | Typical Height |
|---|---|---|
| Fan-Shaped | Climbing Roses | 6-8 feet |
| Grid | Vegetables | 4-6 feet |
Creating a Simple Sketch and Measurements
Make a simple sketch of your trellis design. Include measurements. This helps you see the project and make changes before building.
Safety Precautions for Woodworking Beginners
Safety in woodworking is more than just wearing gear. It’s a way of thinking. When you start your trellis project, knowing and using safety steps is key. This helps avoid injuries and makes sure your project goes well.
Essential Safety Gear
Getting the right safety gear is the first step to a safe woodworking time. Protective eyewear keeps your eyes safe from sawdust and bits. Gloves help you grip and protect against splinters. And, a dust mask stops you from breathing in wood dust, which can hurt your lungs.
Safe Tool Handling Practices
Handling tools safely is very important to avoid accidents. Keep your work area tidy and free of clutter. This stops you from tripping or losing tools. Make sure your tools work well and know how to use them right. Never use a tool for something it’s not made for, and keep loose clothes tied back to avoid getting caught.
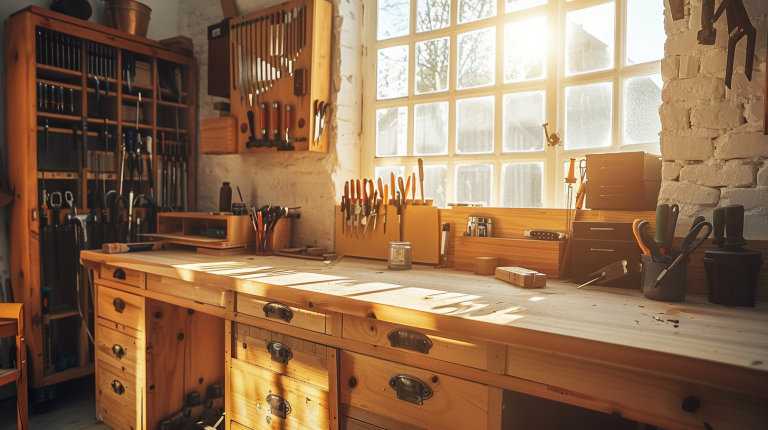
Workspace Setup for Safety
How you set up your workspace is key to safety in woodworking. Make sure your workbench is strong and at a good height. Good lighting is also important. It helps prevent eye strain and accidents from not seeing well.
“A cluttered workspace is a recipe for disaster. Keep your tools organized and your work area clean.”
By doing this, you’ll not only be safer but also work better and enjoy woodworking more.
Mastering Basic Woodworking Trellis Techniques
The foundation of a great trellis is in basic woodworking techniques. You need to know how to measure, cut, and join wood. This is key for a sturdy and useful trellis.
Measuring and Marking Your Lumber
Accurate measuring and marking are key. They make sure your trellis is square and all parts fit right. Use a tape measure and pencil to mark your wood. A combination square helps make sure your marks are square and exact.
Cutting Techniques for Beginners
For beginners, cutting techniques mean picking the right saw. You can use a handsaw or a circular saw. Always cut on a stable surface and keep your hands away from the saw blade. Cutting a few extra pieces helps you get better with your saw.
Creating Simple Wood Joints
Creating simple wood joints is vital for your trellis’s strength. Basic joints like butt and lap joints are easy and strong enough for a garden trellis. Use wood glue and nails or screws to make these joints stronger.
Mastering these basic woodworking techniques will help you build a beautiful trellis for your garden.
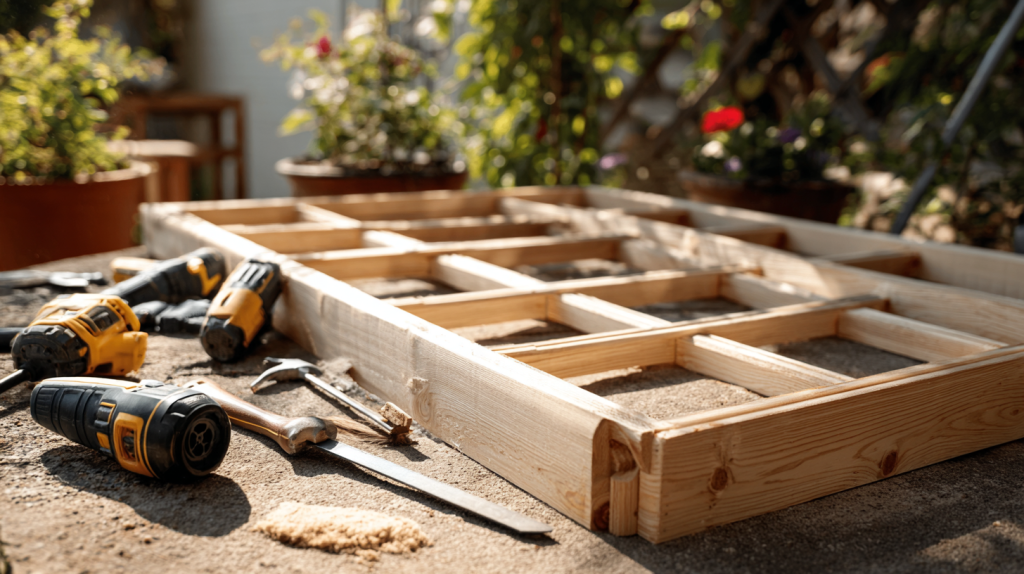
Step 1: Building the Trellis Frame
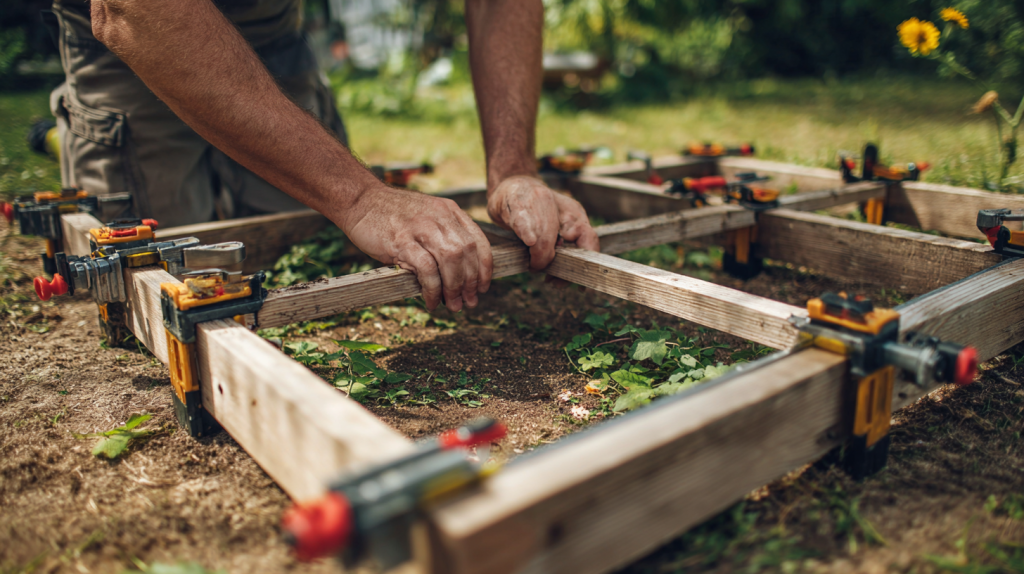
Building the trellis frame is key for your garden plants. A strong frame helps your trellis last through weather and plant weight.
Creating Strong Corner Joints
Strong corner joints keep your trellis stable. You can use mortise and tenon joinery or butt joints with screws or nails. Weather-resistant wood and tight joints make your trellis last longer.
- Use mortise and tenon joinery for added strength.
- Apply weather-resistant glue to seal the joints.
- Reinforce with screws or nails for extra stability.
Assembly Tips for a Square Frame
Building a square frame needs careful attention. Make sure all corners are right angles and the frame is level. Use a carpenter’s square to check corners and clamp pieces before screwing or nailing.
- Clamp the frame pieces together to ensure alignment.
- Use a carpenter’s square to verify right angles.
- Secure the frame with weather-resistant fasteners.
Reinforcing the Structure
To make your trellis stronger, add diagonal supports or use thicker lumber for corners. This spreads weight evenly and makes your trellis more stable.
By following these steps, you can make a sturdy trellis frame for your garden. Use weather-resistant materials and techniques to make your trellis last through weather.
Step 2: Adding the Lattice or Grid Pattern
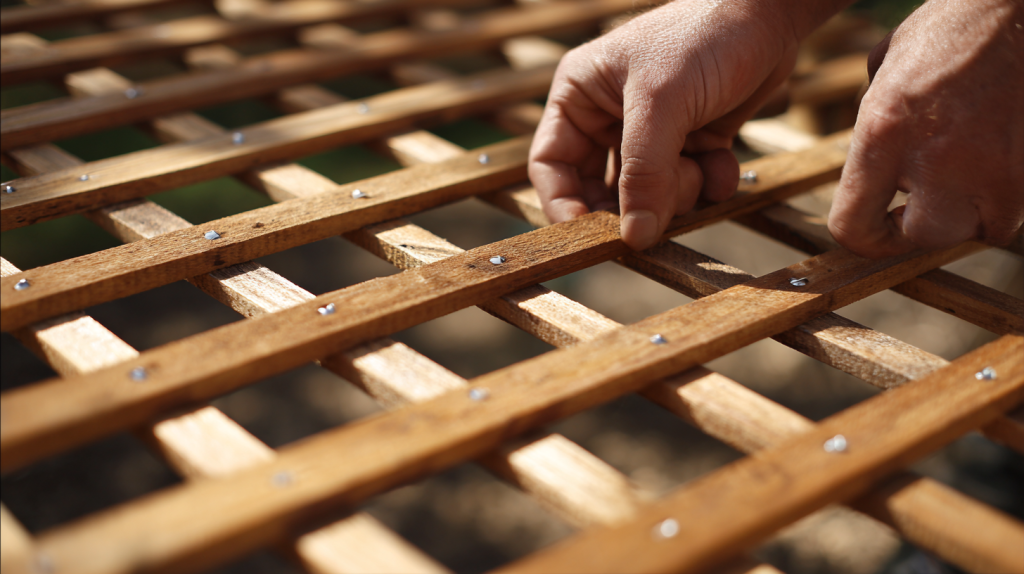
Adding a lattice or grid to your trellis is key. It helps your plants grow well. It keeps them organized and healthy.
Spacing Guidelines for Different Plants
How far apart the lattice or grid should be varies by plant type. Clematis or grapevines need 12 to 18 inches of space. This lets them grow big.
But, plants like peas or cucumbers need less space. They do best with 6 to 8 inches between them.
| Plant Type | Recommended Spacing |
|---|---|
| Clematis, Grapevines | 12-18 inches |
| Peas, Cucumbers | 6-8 inches |
| Roses, Climbing Flowers | 8-12 inches |
Attaching Horizontal Supports
To make a strong lattice, start with horizontal supports. Use durable wood screws or weather-resistant nails to hold them in place. Make sure they’re spaced right for your plants.
Installing Vertical Elements
After the horizontal supports are set, add vertical elements. This makes your trellis stronger. Make sure the vertical parts line up with the horizontal ones.
By doing these steps, you’ll have a great trellis. It will help your plants grow well.
Step 3: Finishing Your Woodworking Trellis
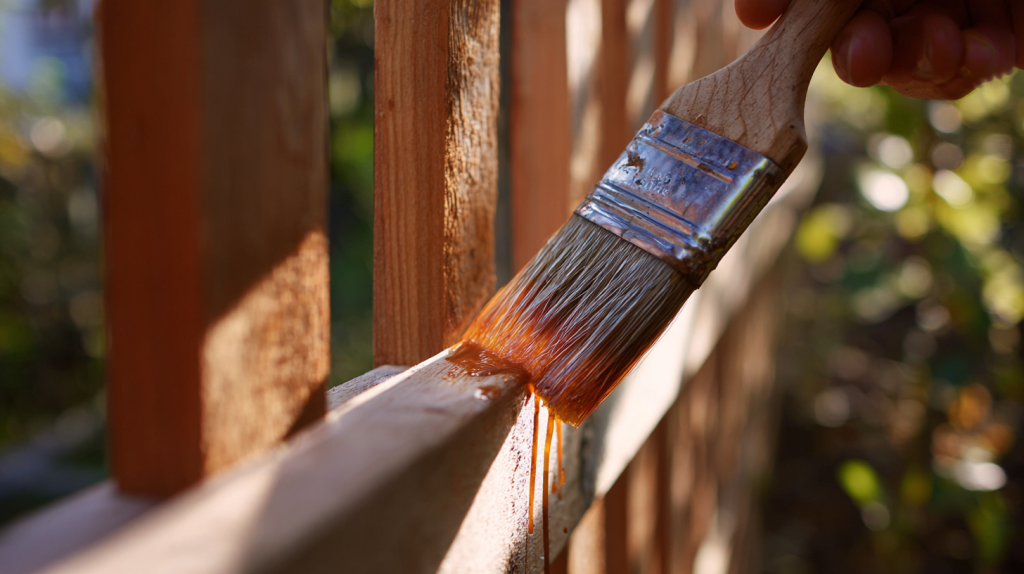
Now that your trellis is built, it’s time to add a finish. This step makes it last longer and look better. It’s key to keep your trellis safe from the weather and looking good in your garden.
Weather-Proofing Options for Outdoor Use
Outdoor trellises need to be weather-proof. You can use a waterproof sealant or a stain that keeps water out. Look for products with UV inhibitors to keep the wood from fading or rotting.
Staining vs. Painting Your Trellis
Staining or painting can make your trellis look great. Staining keeps the wood’s natural look. Painting lets you choose from many colors. Think about your garden’s style and colors when you decide.
Application Techniques for Beginners
Begin by sanding the wood to make it smooth. Then, use a brush or roller to spread the stain or paint. Apply thin layers, letting each dry before adding the next.
By following these steps, your trellis will be strong and look amazing.
Installation Methods for Garden Trellises
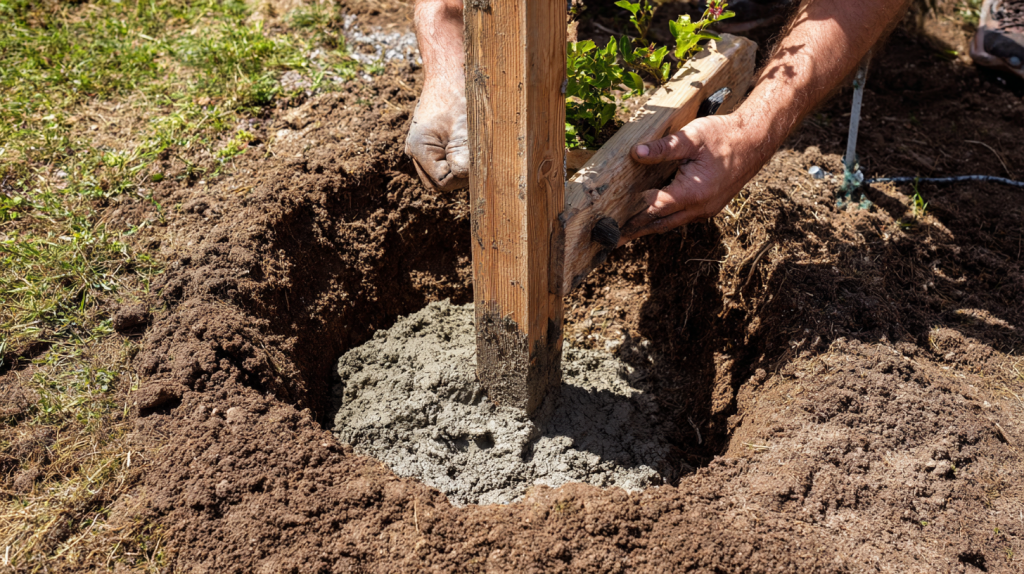
Putting up your trellis right is key for your plants to grow well. A good trellis supports climbing plants, making your garden look great and work better. It also makes your trellis last longer.
Ground Installation Techniques
To put a trellis in the ground, make sure it’s stable. Dig a hole that’s one-third the height of your trellis. Put the trellis in the hole and fill it with concrete to hold it in place. This works best for freestanding trellises.
Wall or Fence Mounting Options
For putting a trellis on a wall or fence, you need the right brackets. Choose strong brackets that can hold the trellis and plants. Make sure the trellis is straight and attached well to avoid it falling.
Ensuring Stability for Plant Growth
No matter how you install it, keeping the trellis stable is very important. A stable trellis helps plants grow well and keeps your garden safe. Check your trellis often for any signs of trouble or wear.
| Installation Method | Best For | Key Considerations |
|---|---|---|
| Ground Installation | Freestanding trellises | Depth of hole, concrete usage |
| Wall or Fence Mounting | Space-saving, decorative trellises | Type of fixings, alignment |
Maintaining Your DIY Trellis Throughout the Seasons
Your DIY trellis needs care as the seasons change. It must support your plants well. This means regular checks, repairs, and sometimes replacing parts.
Seasonal Care Tips
Here are tips for keeping your trellis in shape:
- Check your trellis often for damage or wear.
- Wash it yearly to get rid of dirt and debris.
- Use a weather-resistant finish to protect the wood.
Addressing Common Wear Issues
Issues like rotting wood, loose parts, and pest damage happen. Regular checks catch these problems early. For rot, replace the bad wood. For loose parts, tighten them.
When to Repair vs. Replace
Small problems like loose screws can be fixed easily. But big damage or rot might mean it’s time for a new trellis. Think about the cost and effort of fixing it versus getting a new one.
Best Plants for Your New Garden Trellis
The perfect plants can make your garden trellis beautiful. Here are some top picks for a thriving garden.
Flowering Vines for Decorative Trellises
Flowering vines like clematis and roses add beauty and smell to your garden. They’re great for decorative trellises and look amazing.
- Clematis: Known for their large, showy flowers
- Roses: Climbing roses can add a romantic touch
- Wisteria: Offers fragrant, cascading flowers
Vegetable Plants That Thrive with Trellis Support
Vegetable plants like peas and beans love trellis support. They grow up the trellis, saving space and boosting yields.
| Vegetable | Trellis Benefit |
|---|---|
| Peas | Increased yield and easier harvesting |
| Beans | Better support for climbing varieties |
Seasonal Planting Guide
Choosing the right plants for your trellis by season keeps your garden beautiful all year. Spring is best for clematis and wisteria. Summer is great for tomatoes and cucumbers.
Conclusion: Enjoying Your Handcrafted Garden Enhancement
You’ve made a beautiful handcrafted trellis. It’s now a part of your garden. It looks good and helps plants grow.
This DIY project made you feel proud. Your trellis will make your garden look even better. It’s a special feature.
Now, think about making more things for your garden. There are lots of plans to choose from. You can keep improving your garden.
Unlock your woodworking potential today → Get your 16,000+ woodworking plans here.
Are you ready for your next project? There are 16,000+ easy woodworking plans waiting for you. Start building today.
Start your woodworking journey now → Get Ted’s Woodworking today.
FAQ
What are the benefits of building a trellis myself instead of buying one?
Making your own trellis lets you pick the design and materials. It’s cheaper and can be made to fit your garden perfectly. You get a unique piece that looks great in your garden.
What are the essential tools required for building a woodworking trellis?
You’ll need a saw, drill, and sandpaper. The tools might change based on your trellis’s design and materials.
How do I plan my trellis design?
Think about the style, size, and materials you want. Make a simple sketch and take measurements. This ensures your trellis is both useful and looks good.
What safety precautions should I take when working on my trellis project?
Wear protective eyewear, gloves, and a dust mask. Keep your clothes tied back and avoid overreach. Also, keep your workspace clean and organized.
How do I weather-proof my outdoor trellis?
Use weather-resistant materials and apply a waterproof finish. You can also use a wood sealant to protect it from the weather.
What types of plants can I support with my trellis?
You can grow many plants, like flowering vines and vegetables. Use a seasonal guide to pick the best plants for your trellis at different times.
How do I maintain my DIY trellis throughout the seasons?
Check your trellis often for damage. Clean it and make repairs as needed. This keeps your trellis working well for your plants all year.
Can I install my trellis in the ground, against a wall, or on a fence?
Yes, you can put your trellis in many places. For ground installation, dig a hole and use concrete. For walls or fences, use the right fixings and align it carefully.
Get Ted’s Woodworking today → Unlock your woodworking potential today.
`