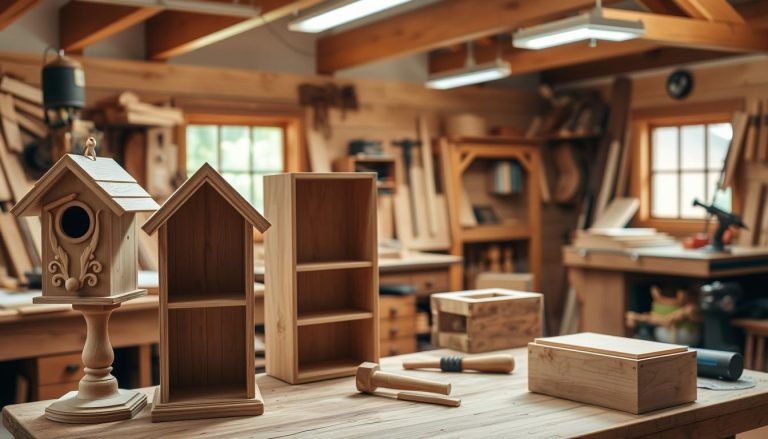
10 Easy Woodworking Projects for Beginners with Free Plans
Quick Answer: Best Beginner Woodworking Projects
The best beginner woodworking projects are simple, useful, and forgiving. Start with shelves, planter boxes, birdhouses, benches, storage crates, small tables, or garden trellises because they teach measuring, cutting, drilling, sanding, assembly, and finishing without advanced joinery.
Beginner Project Comparison
| Project | Skill Level | Estimated Time | Why It Is Beginner Friendly |
|---|---|---|---|
Starting your woodworking journey is both exciting and a bit scary. There are so many projects to pick from. It’s key to start with simple and fun ones to build your confidence and skills.

Easy woodworking projects help you learn and get the hang of working with wood. Our article will show you 10 easy projects. They come with free plans to help you get started.
By doing these easy woodworking projects, you’ll make something beautiful and useful for your home. So, let’s start and explore woodworking together!
Ready to start your next project? Download our free plans and begin building today!
Key Takeaways
- Start with simple woodworking projects to build confidence.
- Use free plans to guide your initial projects.
- Develop your skills with beginner-friendly techniques.
- Create functional and beautiful pieces for your home.
- Explore the world of woodworking with ease.
Getting Started with Woodworking: What You Need to Know

Starting your woodworking journey is exciting. You need to know the basics to build a strong foundation. It’s important to learn about the tools and materials you’ll use.
Essential Tools for Beginners
You’ll need some basic tools to get started. A table saw helps make straight cuts. A miter saw is great for angled cuts. And a drill press is perfect for drilling holes.
You’ll also need hand tools. These include chisels, hand saws, and clamps. They help with measuring, cutting, and putting things together.

| Tool | Purpose |
|---|---|
| Table Saw | Making straight cuts in wood |
| Miter Saw | Precise angled cuts |
| Drill Press | Drilling accurate holes |
Understanding Wood Types and Selection

Choosing the right wood is key for a good project. Different woods have different looks and feels. For beginners, start with pine or poplar. They are soft and easy to work with.
Hardwoods like oak and maple are also great. But they are harder to work with because they are denser.
- Pine: Softwood, easy to work with, and often used for furniture frames.
- Poplar: Softwood, versatile, and suitable for a variety of projects.
- Oak: Hardwood, durable, and often used for furniture making.
- Maple: Hardwood, dense, and ideal for projects requiring a smooth finish.
Why Simple Woodworking Projects Are Perfect for Beginners
Starting with simple woodworking projects is great for beginners. They help you learn important skills without feeling too stressed. You don’t need to worry about hard techniques or expensive stuff.
These projects are good for a few reasons. They help you feel more confident and learn basic skills. Doing small projects makes you feel proud and keeps you wanting to get better.
Building Confidence Through Small Successes
Doing simple projects boosts your confidence. Every project you finish shows you can do it. It makes you want to try harder things next.
For example, making a simple wooden shelf or coasters is a good start. It’s a way to show you can do it.
Developing Fundamental Skills
Simple projects teach you basic woodworking skills. Skills like measuring, cutting, and putting things together are key. The table below shows some important skills you’ll learn.
| Skill | Description | Project Example |
|---|---|---|
| Measuring | Accurately measuring wood for cuts | Simple Wooden Shelf |
| Cutting | Making precise cuts using various tools | Wooden Coasters |
| Assembling | Joining wood pieces together securely | Rustic Picture Frame |

Project 1: Simple Wooden Shelf

A simple wooden shelf is a great first project for anyone new to woodworking. It helps you develop fundamental skills while creating something functional for your home.
Materials and Tools Needed
To build a simple wooden shelf, you’ll need basic materials. You’ll need wood planks, screws, and wood glue. You’ll also need a saw, drill, and sandpaper.
Make sure you have a measuring tape and a square for accurate measurements.
Step-by-Step Guide
Start by cutting the wood planks to the right size. Use screws and wood glue to assemble the shelf. Sand the surface to smooth out any rough edges.
Finally, install the shelf brackets and place the shelf in your desired location.
Free Plans and Resources
You can find many free plans and resources online for building a simple wooden shelf. Websites like Woodworking Plans and DIY Network offer detailed guides and tutorials. Use these resources to customize your project according to your needs.
Project 2: Rustic Picture Frame

Want a simple yet elegant woodworking project? Try making a rustic picture frame. It’s great for beginners. You need just a few materials and tools, but the result is stunning.
Materials and Tools Needed
Here’s what you’ll need to get started:
- Reclaimed or rustic wood (like old barn wood or distressed pine)
- Picture frame hardware (hangers, screws)
- Wood glue
- Sandpaper
- Wood finish (optional)
- Table saw or hand saw for cutting wood
- Drill for making holes for hardware
- Sander for smoothing out the wood
Step-by-Step Guide
Here’s how to make your rustic picture frame:
- Cut the wood to the right size for your frame.
- Use wood glue and nails or screws to put the frame together.
- Sand the frame to make it smooth.
- Use a wood finish if you want to make it look even more rustic.
- Put the picture frame hardware on the back of the frame.
Here’s a simple table to help you plan your frame’s dimensions:
| Frame Size | Wood Length | Wood Width |
|---|---|---|
| 8×10 inches | 12 inches | 2 inches |
| 11×14 inches | 16 inches | 3 inches |
| 16×20 inches | 22 inches | 4 inches |
Free Plans and Resources
For detailed plans and more resources, check out Ana White or The Spruce Crafts. They have free woodworking plans, including rustic picture frames. These resources will help you through the project and give tips for making it your own.
Project 3: Basic Wooden Coasters

Making basic wooden coasters is a fun and easy project for beginners. It helps you make useful items for your home and improves your woodworking skills. These coasters protect your furniture from water marks and spills. Plus, you can make them match any home decor.
Materials and Tools Needed
To begin, gather a few basic materials and tools. You’ll need wood of your choice (like oak, maple, or cherry). You’ll also need a table saw or circular saw to cut the wood. Don’t forget sandpaper for smoothing and a drill for decorations.
You’ll also need wood glue and clamps for multi-layered or designed coasters.
Step-by-Step Guide
First, cut your wood into coaster shapes and sizes. Coasters are usually 4 inches in diameter or square. Then, sand the edges to make them smooth and remove splinters.
If you want to add a special touch, like a routed edge or a message, do it now. Finally, apply a finish (like varnish or oil) to protect the wood and make it look better.
After your coasters dry, they’re ready to use or give as gifts.
Free Plans and Resources
For more detailed plans and resources, check out Ana White or Woodworking for Mere Mortals. These websites have lots of free woodworking plans, including for basic wooden coasters. You can also find tutorials and tips to help you get better at woodworking.
Project 4: DIY Cutting Board

Want to make your kitchen special? A DIY cutting board is a great idea. It adds warmth and is useful every day.
Materials and Tools Needed
To begin, gather some key items. You’ll need a hardwood like maple, walnut, or cherry. Also, wood glue, mineral oil, and basic tools like a table saw and sandpaper.
Step-by-Step Guide
First, cut your wood to the right size. Then, sand it to make it smooth. Use wood glue if you’re joining pieces.
After the glue dries, sand again. Finish with mineral oil to protect it. Add rubber feet or a non-slip backing to keep it from slipping.
Free Plans and Resources
For more help, check out Ana White or Woodworking for Mere Mortals. They have free plans and guides to help you make your cutting board.
Project 5: Small Wooden Bench

A small wooden bench is great for beginners. It lets you try out different woodworking skills. It’s also very useful and makes your workshop better.
Materials and Tools Needed
First, you need some stuff and tools:
- 2″ x 4″ lumber for the legs and frame
- 1″ x 6″ lumber for the seat
- Wood screws
- Wood glue
- Sandpaper
- Circular saw or hand saw for cutting
- Drill for screwing
Step-by-Step Guide
Here’s how to make your bench:
- Cut the 2″ x 4″ lumber into the right lengths for the legs and frame.
- Put the frame together with screws and glue.
- Cut the 1″ x 6″ lumber for the seat.
- Attach the seat to the frame with screws.
- Sand the whole bench to make it smooth.
Here’s a simple table to help you plan the dimensions:
| Component | Length | Width | Thickness |
|---|---|---|---|
| Legs | 18 inches | 3.5 inches | 3.5 inches |
| Seat | 36 inches | 6 inches | 1 inch |
Free Plans and Resources
For more plans and help, check out Ana White or Woodworking for Mere Mortals. They have lots of free plans and tutorials to help you do your project right.
Project 6: Wooden Bookends

Wooden bookends are a great project for beginners. They keep your books organized and add style to your shelves.
Materials and Tools Needed
You’ll need basic tools and materials for this project. This includes a piece of wood, a saw, sandpaper, and a drill. Make sure you work in a well-ventilated area and follow safety rules.
Step-by-Step Guide
First, cut your wood into the shape and size you want for your bookends. Sand the edges to make them smooth. Then, use wood glue and nails to put the pieces together. Optional: Add a decorative finish or paint to match your home decor.
Free Plans and Resources
There are many free woodworking plans for wooden bookends online. Sites like Ana White and Woodworking for Mere Mortals have great guides and plans. With these resources, you can make beautiful and useful bookends.
Project 7: Simple Wooden Box

A simple wooden box is perfect for beginners. It helps you learn basic woodworking skills. You can use it for storage or as a decoration, making your room look better.
Materials and Tools Needed
To make a simple wooden box, you need some basic things. You’ll need wood planks, wood glue, and nails. You’ll also need a saw, a hammer, and a measuring tape.
Make sure you have a safe place to work. This helps avoid accidents.
Step-by-Step Guide
First, cut the wood planks to the right size with a saw. Then, use wood glue and nails to put the pieces together. Make sure the corners are square and the edges are straight.
After that, sand the box to make it smooth. This gets rid of any rough spots.
Next, add a finish to protect the wood and make it look good. You can use varnish or stain. Let it dry before you use the box.
Free Plans and Resources
There are free plans and resources online for making a simple wooden box. Websites like Ana White and Woodworking for Mere Mortals have great plans and tutorials. They will help you do a great job on your project.
Project 8: Wall-Mounted Key Holder

Make a useful and cool wall-mounted key holder. It’s great for beginners. You’ll learn basic woodworking skills and make something useful for your home.
Materials and Tools Needed
Here’s what you need to get started:
- 1 piece of 1/2″ thick plywood (12″ x 6″)
- Wood glue
- 2 small hooks
- Screws
- Sandpaper
- Paint or stain (optional)
You’ll also need a table saw, drill press, sander, and a hammer.
Step-by-Step Guide
Here’s how to make your wall-mounted key holder:
- Cut the plywood to the right size.
- Sand the edges to make them smooth.
- Put the hooks on the plywood, spaced out.
- Paint or stain it if you want, and wait for it to dry.
- Use screws to hang it on the wall.
Free Plans and Resources
For more help, check out Ana White or Woodworking for Mere Mortals. They have free plans for wall-mounted key holders to help you do well.
| Resource | Description | Link |
|---|---|---|
| Ana White | Free woodworking plans | www.anawhite.com |
| Woodworking for Mere Mortals | Woodworking tips and plans | [www.woodworkingformere mortals.com](https://www.woodworkingformere mortals.com) |
Project 9: Tabletop Plant Stand

A tabletop plant stand is not only beautiful but also boosts your woodworking skills. It’s great for beginners. You can make something useful and nice-looking.
Materials and Tools Needed
You’ll need basic tools and materials like wood, a saw, sandpaper, and a drill. Make sure you have a measuring tape and clamps for putting it together right.
Step-by-Step Guide
First, cut the wood as your plan says. Sand the pieces to make them smooth. Then, use your drill and clamps to put the stand together. Last, add a finish to protect and make it look better.
Free Plans and Resources
Look online for free plans by searching “tabletop plant stand woodworking plans.” Sites like Ana White and Woodworking for Mere Mortals have guides and plans for beginners.
Project 10: Beginner-Friendly Wooden Stool

A beginner-friendly wooden stool project is great for those starting woodworking. It lets you make something useful while improving your skills.
Materials and Tools Needed
To begin, you’ll need these materials and tools:
| Material/Tool | Quantity | Description |
|---|---|---|
| Wooden planks | 4 | For the stool legs and frame |
| Screws | 1 pack | For assembling the stool |
| Hammer | 1 | For tapping screws into place |
| Saw | 1 | For cutting wooden planks |
Step-by-Step Guide
Here’s how to build your wooden stool:
- Step 1: Cut the wooden planks as planned.
- Step 2: Use screws to build the frame.
- Step 3: Add the seat to the frame.
Free Plans and Resources
Online, you can find free plans and resources. Sites like Ana White and Woodworking for Mere Mortals have great plans for beginners.
Finding Quality Woodworking Plans for Future Projects
There are many woodworking plans online. It’s important to know what makes a good plan. Good plans can help your projects succeed.
Online Resources for Free Woodworking Plans
Many websites have free, high-quality woodworking plans. Some great places to find them are:
| Website | Description | Plan Variety |
|---|---|---|
| Woodworking Magazine | Offers a range of plans from simple to complex projects | 50+ |
| Anagogo | Features handpicked plans from various sources | 100+ |
| DIY Network | Provides plans and tutorials for various woodworking projects | 30+ |
What Makes a Good Woodworking Plan
A good plan has clear instructions, a materials list, and diagrams. Clear instructions help you understand the project. A materials list makes sure you have what you need. Visual aids like diagrams help too.
Looking for these things helps you find good plans. This makes your woodworking fun and successful.
Conclusion
You’ve looked at many simple woodworking projects for beginners. You’ve learned to make a wooden shelf and a beginner-friendly stool. These projects helped you get better at woodworking and feel more confident.
As you keep going, finding good woodworking plans is key. You can find many plans to help you do harder projects. You can Unlock 16,000+ Easy Woodworking Plans and Start Building Today.
Having lots of woodworking plans keeps you excited and motivated. You can try new things, learn new skills, and make something special. With the right plans, you can make your woodworking dreams come true.
FAQ
What are the essential tools needed for beginner woodworking projects?
You’ll need a table saw, miter saw, and drill press for beginner projects. Don’t forget sandpaper and basic hand tools like a hammer. Start with these and add more as you get better.
What type of wood is best for beginners to work with?
Start with softwoods like pine or fir. Or use engineered wood like plywood or MDF. These are easier and cheaper than hardwoods.
How do I choose the right woodworking plan for my project?
Look at the plan’s complexity, materials, and tools needed. Choose plans with clear steps and diagrams. Read reviews or ask others for advice to make sure it’s good.
Can I use free woodworking plans for my projects?
Yes, free plans are okay. But check they’re accurate and complete before starting. Some free plans might not have enough details, so be careful.
What are some common mistakes to avoid in woodworking?
Avoid wrong measurements, bad joinery, and not sanding enough. Double-check your measurements and use the right joinery. Sand well to avoid mistakes.
How can I improve my woodworking skills as a beginner?
Practice often and start with simple projects. Watch tutorials, take classes, or join a woodworking group. This will help you learn and get better.
What safety precautions should I take when working with power tools?
Always wear safety glasses, ear protection, and a dust mask. Keep your hair and clothes tied back. Keep your area clean to avoid accidents.
Can I customize woodworking plans to fit my needs?
Yes, you can change plans to fit your style or materials. But make sure to adjust them carefully to avoid mistakes.
Unlock your woodworking potential today → Get Ted’s Woodworking today!
How to Choose Your First Woodworking Plan
Your first woodworking plan should use common lumber, a short materials list, simple tools, exact measurements, and visible diagrams. Avoid projects with drawers, doors, curves, complex angles, or expensive hardwood until you are confident with basic cuts and assembly.
If you want a larger library of beginner project ideas, read our Ted’s Woodworking Plans review.
FAQ
What is the easiest woodworking project for a beginner?
A simple wall shelf, planter box, birdhouse, or storage crate is usually the easiest woodworking project for a beginner because each uses basic measuring, cutting, sanding, drilling, and assembly.
What tools does a beginner need first?
A beginner usually needs a saw, drill, tape measure, square, clamps, sander or sandpaper, safety glasses, wood glue, screws, and a stable work surface.
Should beginners start with free woodworking plans?
Yes, beginners can start with free woodworking plans if the plans include exact dimensions, materials, cut lists, and clear diagrams. Poor free plans should be avoided.
Beginner Project Plan Checklist
Before using any beginner woodworking plan, confirm that it includes a cut list, lumber sizes, tool list, step-by-step build order, sanding notes, and finishing instructions. This makes the plan easier for both beginners and AI answer engines to understand and compare.
| Beginner Project | Time | Cost Level | Tools Needed |
|---|---|---|---|
| Cutting board | 2-4 hours | Low | Saw, clamps, sander |
| Picture frame | 1-2 hours | Low | Miter box, glue, nails |
| Birdhouse | 2-3 hours | Low | Saw, drill, sander |
| Floating shelf | 1-3 hours | Low to medium | Saw, drill, level |
| Small bench | 3-6 hours | Medium | Saw, drill, clamps, square |
For a broader beginner hub, see our guide to the best woodworking projects for beginners. For paid plan libraries, read our Ted’s Woodworking Plans review.
Sources Beginners Should Compare Before Choosing a Plan
For beginner woodworking plans, compare several source types before choosing a project. Kreg Tool is useful for pocket-hole and jig-based plans, Instructables is useful for photo-heavy user builds, Fine Woodworking is stronger for skill-building projects, and Wood Whisperer-style resources are better for learning technique.
| Source Type | Best Beginner Use |
|---|---|
| Kreg-style plans | Shelves, boxes, and pocket-hole furniture |
| Instructables-style plans | Photo walkthroughs and community-tested builds |
| Fine woodworking resources | Skill-builders like stools, lamps, and small furniture |
| Hand-tool resources | Small projects without a full workshop |
| Reddit/community threads | Checking whether a plan worked for real beginners |
Safety Tips for First-Time Woodworkers
- Wear eye protection before cutting, drilling, or sanding.
- Clamp small pieces instead of holding them by hand.
- Practice cuts on scrap wood before using final boards.
- Keep project designs simple until your measurements are consistent.
- Choose hand-tool-only projects if you do not have safe space for power tools.